Or, I thought Utitza’s were bigger? A scaled down version due to space issues on the table, I guess size does matter, at least on the table top.
Rules are Field of Battle, 3rd edition.
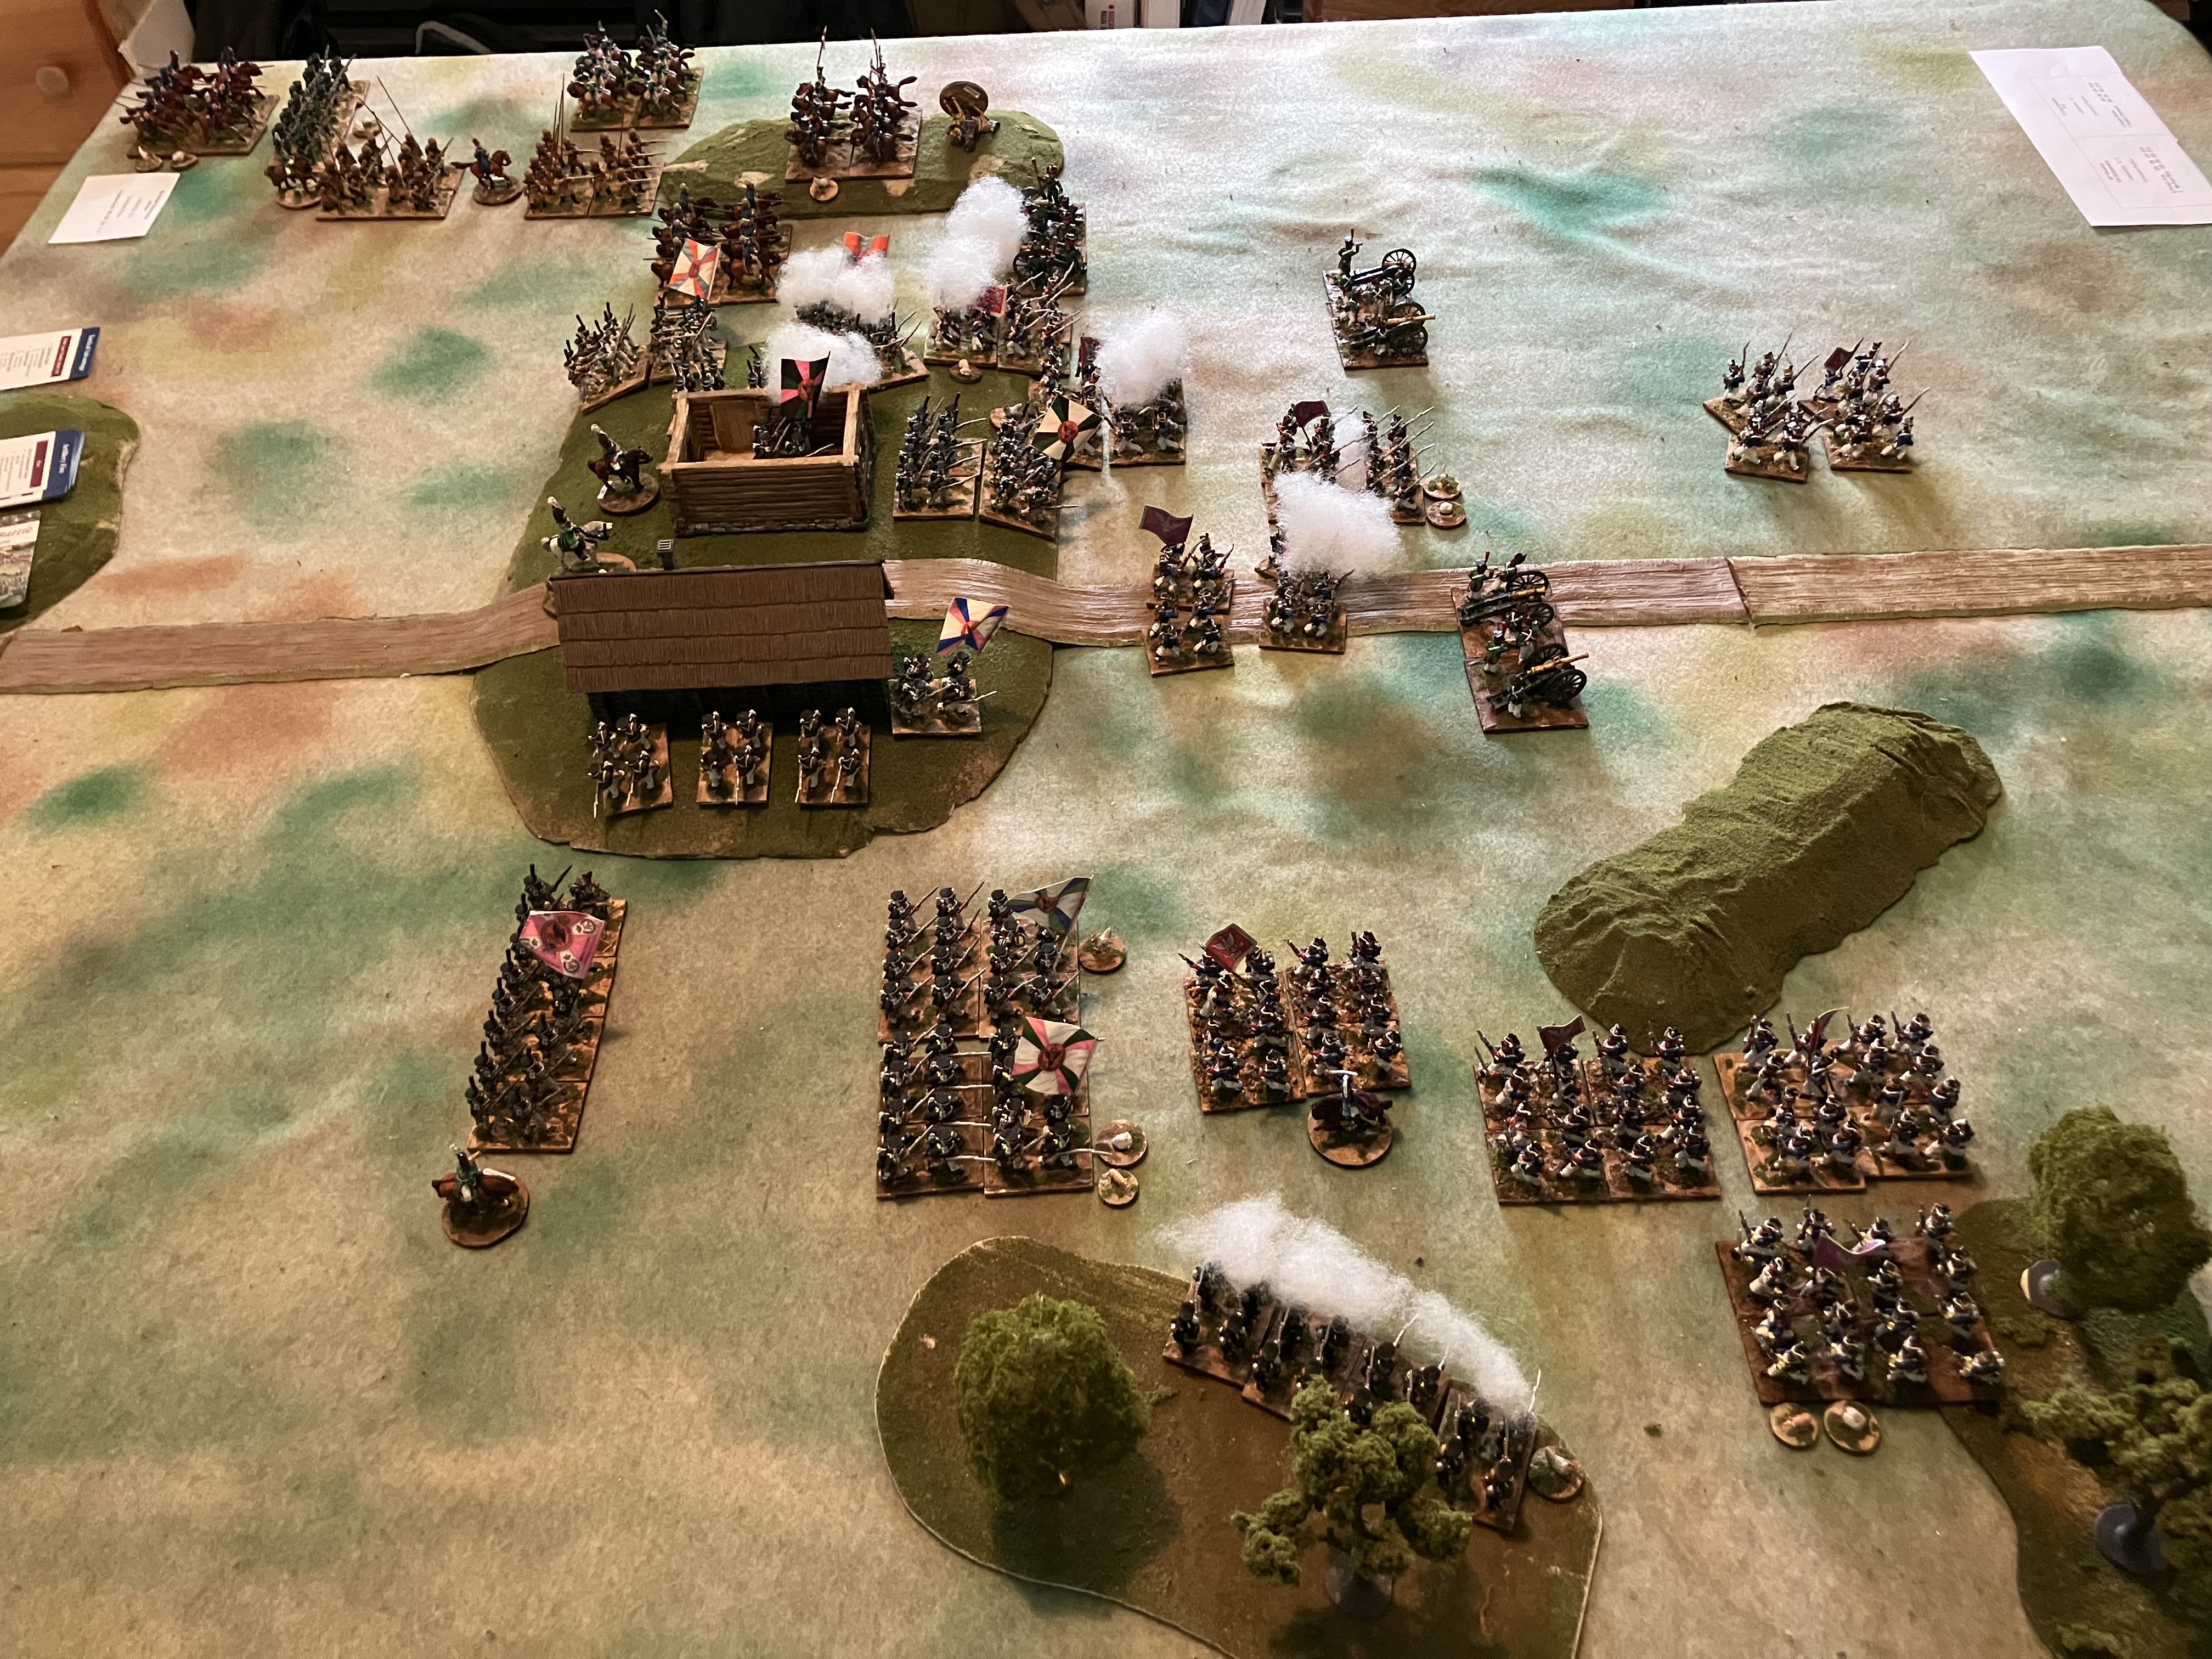
After having pulled out the Duchy of Warsaw troops during the game room organization effort, I decided to get them back on the table in their role on the French right flank at Borodino. So I dug through my computer files and found the OB and maps we used for our Borodino game back in 2012 at Historicon. Unfortunately, I don’t have enough table space for the full layout, so what follows is a compacted battle field.
The initial setup.


Turn 1
The first turn consisted of wasted cards for the Russians, the Poles on the other hand turned a Move card and Zayonchek’s Division on the Polish left flank surged ahead 2 move segments. Not to be outdone, Kniaziewicz in the center stormed forward 3 move segments, almost making it to the base of the Utitiza hill. The Cavalry on the right Polish right flank was clearly intimidate by this display and plodded forward one move segment. The lone Russian Battery took the opportunity to fire at the infantry as they closed, inflicting one paltry casualty. This may not be a very long battle report. The next Polish card was useless, but the 2 foot batteries elected to fire while they still had the inititive, and before their infantry blocked their fire. The result of the cannonade was… nothing.


Turn 2
The second turn saw the Russian’s again win the initiative by one, turning… an Artillery Fire card! Sometimes the card gods are generous. The Russian artillery fires, inflicting 2 hits on the Polish Infantry, but rolling odd, so the Poles stand. (I think I got that right, while I’ve played Field of Battle 3rd Edition before a long time ago, I haven’t ever run a game). The Poles turn a ‘Lull’ card, but the Russian’s fail to seize the initiative.

Turn 3
Turn three saw the Russian’s again win the initiative by 8 and given the close proximity of the Poles the Russians opted to go first. The first really useful card turned was an artillery fire, resulting in one hit which destroyed the already battered Polish infantry unit in front of the battery. The Russian Grenadiers in the town used anInfantry Fire card to take a long range shot at the Poles and missed. The Jagers in the woods used a move 1 command card to side step.
The Polish initiative saw them turning their first card which was another move card, things may get interesting. Kniaziewicz Poles in the center advanced 2 segments into contact with the buildings, unfortunately they rolled odd, taking fire from the Grenadiers in the town, who missed. 2 Polish units fired at the unloaded Russian battery, doing a total of 2 hits to the battery. The Polish left flank under Zayonchek refused to move, even when Prince Poniatowski directly intervened, they still refused to move forward. I guess fearful of the lone Russian Jager unit in the woods? The Cavalry on the Polish right flank finally decided to move in a big way, charging forward 3 move segments into contact with the Russian Opolochenie, but unable to initiate melee.
The Polish horse battery used an artillery fire card to cause 1 damage on a Cossack Regiment.
The Poles then turned another Move card. Zayonchek division on the Polish left flank cautiously moved forward, the lead unit contacting the woods the Russian Jagers were defending. The woods erupted in smoke and the smell of sulfur, resulting in 2 hits for the lead polish unit. Kniaziewicz division in the center finally rolled even on a move roll, but only won one segment. That was enough to allow the Poles to melee the Russian artillery, when the dust settled all that could be seen was the guns, the gunners were wiped out defending their guns.

The Polish assault on the Grenadiers in town went poorly, with the attackers taking 2 hits and routing them. The Polish Cavalry rolled one move segment, but the roll was even which allowed them to initiate melee with the Russian Opolchinie, resulting in one hit to the Opolochinie. I realized I forgot to fire the Opolchinie when the caalry came into contact, so I fired that as well, resulting in no hits but forcing the cavalry to fall back.
The next useful card the Poles turned was a move one command resulting in Zayonchek on the Polish left flank getting 2 move segments, moving into contact and initiating a firefight with the unit on the far Russian right flank, with the Poles taking 2 hits and the Russian’s taking 1 hit.
Leadership card, unit on Poles left flank recovered 2 hits. Artillery firepower, Horse battery fires on Cossacks, routing them.

Turn 4 saw the Russian’s again win the initiatives, by one and turn a Melee card. On the Russian right flank the Jagers in the wood melee the Poles to their front, causing 1 hit and pushing the Poles back. The far right Russian line unit melee’s the polish unit to its front, inflicting 2 hits which destroys it. The Grenadiers in the middle of town melee the Poles to their front, and rout them.
The Poles turn a Artillery Fire card, and the horse battery fires at another battery of Cossacks, this time failing to get a hit.

Turn 5 started with The Russian’s again winning the initiative, by four this time. The Infantry Fire card was the first useful card turned. The Jagers in the woods reload and fire into the flank of the Polish unit to their front, and miss; while all the other unloaded units reload.
The Poles seize the initiative on a Lull card, turning a melee card. The Poles assault the Grenadiers in the Village, who fire as the Poles advance, and miss. The Polish assault goes in, and they lose, suffering 1 hit. The French Cavalry charges the Opolochine in line. The Opolochine fire as the French come in and miss. The melee does 1 hit to the Opolochine and forces them back.
The Russians resume their initiative, turning an army morale card, and Konovnitizin, commander of the Russian right flank 3rd Division falls, disordering the entire Division.

The Poles turn another Melee card. The Cavalry charges into the Cossacks, causing 1 hit to the Cossacks. The Poles turn an Army Morale card and the Polish Cavalry Commander falls. Followed by a Leadership card, with one of the Cavalry becoming ordered. And lastly all non-routing infantry units reload on an infantry fire card.

Turn 6 begins with... you guessed it, the Russians again winning the inititive, this time by 3. The first card is a Move card. The Grenadier Division rolls even, for 3 move segments. The Grenadiers behind Utitiza move forward into contact with the Polish infantry, who fire at point blank range with no impact. The horse battery fires at the Grenadiers as they advance as well, causing 2 hits. The Grenadiers fire at the Polish Infantry causing 2 hits. The Grenadiers in the middle of town move into contact with the Polish infantry, taking fire from 2 units resulting in no damage. The Grenadiers then initiate Melee, causing 1 hit. The Cossacks move forward to threaten the unloaded Polish Horse Battery. On the Russian right flank the 3rd Division slowly moves forward, still reeling from the loss of their commander. Followed by a Leadership card, which had some success in rallying and removing hits.
The Poles turn an Infantry Fire, reload, and 2 units fire at the Grenadiers, which both missed. The next card is also Infantry Fire, so repeat, with the same results. The last card for this initiative is a Melee. The only 2 units that can use it are already damaged. The Center is pretty much crumbling, the Polish left flank has stalled, the Right flank cavalry is having success against the Milita units, but still haven’t managed to turn the flank. The wise thing would probably be to hope for a move card and begin to withdraw, but with the eyes of the Emperor upon you, that isn’t an option, so… Attack! The 2 battered Infantry units launch themselves into the Grenadiers, winning one and losing another.

Turn 7, the Russian’s go first again. Starting with a Move card, the Cossacks get 3 move segments putting one unit into contact with the unloaded Polish Horse Battery. The Opolochenie roll even and take the opportunity to form square. Third Division units move into contact but can not initiate melee. The Grenadiers shuffle their formation around to allow 1 unit to fire on the Polish Infantry with no effect. Next card is Infantry Fire, all Russian units reload and the shooting commences, destroying 1 Polish unit.
Another Move card, the Cossacks get 1 move segment, but rolled even, and initiate melee against the unloaded Polish Horse Battery, and the Cossacks loose, routing away. 3rd Division gets 3 move segments with an even roll, moving into contact and initiating melee, causing 1 hit and forcing a unit back.
The last Russian card Melee, a Grenadier unit inflected 1 hit and pushed back a Polish Infantry unit and another was able to melee the Polish Horse Battery, doing 2 hits.
The only useful card on the Polish turn was Leadership, which allowed them to rally one of the routing units of Infantry.

Time to shuffle the deck.
At this point I called it. The Poles had been paying the Russian’s morale chips for a while to the point that the Russians were only down 3 morale chips from their starting number. Plus I needed to have the gaming table picked up before our weekend guest arrived.
I know I got a few things wrong, and sort of forgot about the whole ‘disordered’ thing until around the 3rd or 4th turn. The actual playing time was between an hour and a hour and a half I think. Hard to tell when you break it up into multiple sessions throughout the day.
The Russian Initiative die rolls were crazy lucky. And I think the Poles winning the 3 move segments early on and effectively screening their artillery for most of the battle actually hurt them in this case. In retrospect, with the Russian's only having 1 artillery battery, I think the Poles should have kept their advance a little more on line and given their artillery advantage a chance to do some damage.
All-in-all it felt good to get some Napoleonic figures on the table again.
Take care,
So much lead, so little time


