Sunday, April 24, 2011

The Battle for the Shevardino Redoubt

This is a game I ran with the Hartford Area Historical Gaming Society (HAHGS) way back in February 2009. I was considering taking the troops (15mm) and terrain along on the trip to Historicon this year to run a a potential pick up game. However, given the latest development around Historicon 2011 it sounds as if space for pick up games will be significantly reduced this year.

The below game had originally intended to be run using Piquet’s Field of Battle rules, but at the time SHAKO II was the rage of the group so the game was run using Shako II rules. The figures were 15mm with all of the Russian’s being from my collection and French being provided by Greg H and Peter C as well as my myself. The game was ‘average’ sized with about 1,400 figures on a 6’x12’ table.

This was the first game I had organized in about 23 years and I confess to being disappointed in how it went. The game was set up to accommodate 8 players, we ended up getting 5 plus myself. Another 2 players would have really helped the flow of the game once the French Reserves came on the table.

Attendance aside, the game played out about the way I expected. Compan’s Division stormed the hill, the Russian defenders were tenacious.

The Cossacks and Poles skirmished as the Duchy of Warsaw forces steadily advanced toward the redoubt. In hind site I started the Poles too far away from the action using a fixed movement rule system. In any event by the end of the game the Poles had flanked the redoubt and were applying heavy pressure.

The Russian Cuirassier’s made a historically accurate grand charge into the French line (unfortunately they did it during the hours of daylight instead of in pitch dark like the historical charge) and were summarily shot to pieces.

Sievers Cavalry Corp did a magnificent job of delaying both Morand’s Division, and then engaging the follow on French Reserve Cavalry.

In the end, the result was inevitable although the French failed to take the Redoubt by the time we had to call the game. French casualties were considerably higher than the actual battle but Russian’s (historically) refused to abandon the untenable “pimple of a hill” as Digby Smith describes the action in his book Borodino.

All in all it was a fun game and one I’d really like to try again using Field of Battle.
Below are some photos of the action.

 
Initial Russian Deployment 

 Compan's Division moves out

Poniatowski's Duchy of Warsaw Cavalry and the Cossacks mix it up

 French advance on the Russian left

Russian Cuirassiers charge the French Infantry

 French close on the Redoubt


French continue to press while the Russians hold 
Note the white glue holding the two hill levels together.  I'd just finished the terrain the night before, and at some point on the drive to Hartford they separted - so I had to do emergency repairs before the battle began and apparently over did the glue

Monday, April 18, 2011

Gordetschna at HAVOC XXVII

On April 2nd a subset of the Hartford Area Historical Gaming Society (HAHGS) consisting of Peter A, Thomas K., Greg H., and myself made the trek up to the Worcester Mass for this years HAVOC gaming convention to run Peter’s Gordetschna Napoleonic scenario. The game was run using Piquet’s Field of Battle by Brent Oman.


This was my first trip to HAVOC, Thomas and Peter ran a game last year and Greg has been running games there several years. I was pleasantly surprised with the event. There were 6 or 8 dealers there and about 20 gaming tables set up. I picked up a copy of CHARGE! Great Cavalry Charges of the Napoleonic Wars by Digby Smith from one of the book dealers for considerably less than the best Amazon.com price.

The one down side about the HAVOC venue is that there is only 1 hour between games. This means the ending game has about 30 min. to take down and pack up and the starting game only has about 30 minutes to set up. We were fortunate in that we had play tested the scenario about two months ago so the terrain and deployment were fresh in out minds. Having 4 motivated pairs of hands doing the work greatly helped as well.

The scenario called for 7 players, we had six signed up which allowed Thomas to take command of his beautifully painted Austrian troops.

We had a couple of players who were having issues with the Piquet concept of not being in complete control. They were content to grumble, until they suffered their first set back and then promptly left about 45 minutes into the game. After that, the over all mood seemed to pick up and the remaining players seemed to enjoy the game. Their departure allowed Greg to take over one relatively intact command while I took over the other mauled, over extended command (which is typically how my commands end up – so I was right at home).

This battle played very differently than our play test, with the exception of Thomas continuing his insanely hot dice combined with his unstoppable Austrian juggernaut. This time around the Russian’s withdrew and essentially allowed the Austrian’s to cross the river unopposed. The Russian’s were hampered by the absence of any Artillery Reload cards until the deck was almost completely gone through, and by that point most of their guns were screened by friendly troops.

The Saxon flanking attack which was run by a young gentlemen named Daniel as I recall, had a significantly greater impact this time around. Aided by a couple of 3 move segment rolls, their Hussars stormed out of the woods, looped around the over extended Russian Dragoons, and struck 2 of the 3 Russian Dragoons Regiments as well as a Russian Horse battery in the rear. From there the same unit went on to smash the flank of a Russian Infantry unit before being forced to withdraw by Russian musketry. This left the Russian left flank hanging extremely exposed and unsupported. Had he been able to support the Cavalry with some Infantry he would have most likely rolled up the entire Russian left flank.

As we were setting up the table Greg had mentioned that the Saxon Commander as ‘just flocked last night’ – I wonder if that had anything to do with the Saxon performance?

On the Russian right flank the one bright spot was a charge by some Kalmuck Cossacks into an Austrian unloaded disordered Infantry unit with the Cossacks surprisingly winning. This bought valuable time for the Russian Infantry on that flank to rally and reform.

However, it proved to be to little to late. As the time allotted for the game expired we called it a minor victory for the Austrian’s. The Austrian’s had lost one more moral chip than the Russians, but the Austrian’s held their secondary objective of the ridge line on the Russian left flank, and the Austrian’s were pouring across the river and still had close to an entire Reserve Corps that hadn’t been deployed yet.

All in all I thought the game went well. The players (with the noted exceptions) seemed to have a good time.

Typically in a game if you pay attention to can you hear some rather interesting comments out of context. In addition to our Saxon General just being flocked the night before, there was one more worth reporting. During an Leadership check I overheard the following, “That’s good enough to get their sheep off, but they don’t get their rocks off”. One more reason to use farm animals to mark disordered status and rocks to represent stand losses.

Below are some photos of the action taken by Peter and myself.  Click on the photos to see a larger view.


Initial deployment on the Austrian Left Flank

 Thomas (seated) setting up his Austrian horde


Russian left flank at the start of the game


 Another view of the initial deployment


At the far end of the table you can see the Saxon flanking forces in the woods.  Greg lends advise to the Saxon Commander


 On the Austrian right flank, Saxon Hussars on the hill in the foreground and Austrian Infantry on the hill (the hill was the secondary objective of the Austro-Saxon forces). 

 Austrians cross the river and bridge in the center of the battle field.  The Russian artillery screened by their own Infantry most of the battle was unable to impact the crossing


 Another view of the secondary objective.  By now the Russian Dragoons are all that's keeping the Russian Infantry from being rolled up

 Another view of the secondary objective with even more Austrian Infantry in line ready to blast the Russian Dragoons to pieces, (the Russian's finally turned another move card and the Dragoons wisely pulled back to block the road off the table).

 On the right the Austrian-Saxon forces have the secondary objective well in control and are in position to roll up the Russian line.

 Near the end of the battle, the Russian left flank still relatively intact but significantly further back from the river.

  
 Austrian Hussars charge the unloaded Russian guns.  The rock indicates the Hussars have lost one stand


Austrians streaming across the river onto the Russian side.  The sheep next to the lead Austrian Infantry unit indicates the unit is out of command.


Sunday, March 20, 2011

COLD WARS 2011

Last weekend the Chief of Staff (my patient wife) and I made the trek to Lancaster, PA for the Cold Wars gaming convention. As she does most years, she dropped me off at the Lancaster Host early Friday morning and then she took command of a detachment of Credit Cards with a Checkbook in support and conducted a Reconnaissance in Force of the Antique shops and Outlet Malls. Based on the amount of items in the car trunk and back seat her reconnaissance contributed considerably to the local economy.


For me the main event was Friday nights Cloudships of Mars game, put on by David Kasper. The game was a blast. I may need to the move the 'Space 1889 campaign' up on the projects to do.
Below are some photos.  As always, click, on the photo's for larger views.

Opening stages of the battle from the British point of view


Opening stages from the Martian side


Getting hectic  Note the flying Martian 'boarding party' on the flat stand


Near the end


End of the game


I always try to play in at least one of Phil Viverito's Ancient games, but wasn't able to this year. Phil puts on fantastic looking games, and has a fantastic sense of humor.  I prefer Piquet's Archon, by Eric Burgess over Phil's Classical Hack rules. One of the things I like about Classical Hack is that rolling a "1" is a good thing.  Below are some photos of Phil's table for Alesia. I wish I could make terrain like this.


Until my next post, may your dice roll high.

Thursday, January 20, 2011

2010 Production Totals

It’s a little late but it’s time for the obligatory year in review. As I stated in my first post this Blog was originally started to keep me motivated and provide a way to track my painting progress for our 2012 Historicon project. So, here we go.


2010 was a fairly good year painting wise for me, given that I’m a very slow painter and my painting time is limited to a couple of hours each weekend. In 2010 I managed to complete 252 Infantry figures, 40 Cavalry figures and 27 Gunners (all Front Rank Napoleolnics). All of these were Russian with the exception of 1 French Horse Battery (6 gunners) and 1 Duchy of Warsaw line unit (16 figures). I must admit to being pleased with my ability to stay focused on Napoleonics. I also painted a couple of dozen chickens (to be used for out-of-command markers) and a Guillotine.

In the non-historical arena I also painted a couple of Klingon Warships from the 1980’s I found lurking at the bottom of a lead pile. I blame the excellent “The Lost Fleet” series by Jack Campbell (a.k.a. John G. Hemry) for re-igniting my space combat bug.

But enough of words, eye candy is what everyone wants.  All Infantry, Cavalry and Artillery figures are Front Rank.  The Guillotine is from Black Tree Designs, and the Klingon figures are Amarillo Design Bureau.

As always, click on the below photos to see larger versions.

First up the 12th and 13th Brigade (Dragoons) of Generalmajor Sievers 4th Cavalry Corps. Looks like I need to get around to adding the last two flags to truly finish this up


Next up is the Lithuanian Uhlan Regiment.  I'm building my Uhlan and Hussar Regiments at double strenght (8 stands) to reflect the larger orginzation of these units in Russian service.

Below is Brigade Tuchkov III, of the 3rd Division

Brigade Voeikov of the 3rd Division.  I need to replace the flags of the Seleguinsk Regiment - the 2 units on the right, I had a small issue that caused the white fuzzy look on them

And to finish out the 3rd Division, the Jagers of Brigade Chakoffsk

A Horse Battery


A Heavy Foot Battery - I use the local convention of 4 figures to a stand for Heavy artillery

Close up of some Moscow Opolochenie. Unfortunately the enlarged photos show all the painting errors.


And some Klingon's.  Even my non-Russian painting ended up being green.


Sunday, January 9, 2011

The Battle of Jamesway Junction

Finally a battle report! The battle of Jamesway Junction was generated as a result of our ongoing imaginary 1809 campaign. The battle was fought between myself commanding the Fuddland forces and Peter Anderson serving as the proxy commander for the forces of Gulderland. This was a very small action that involved forces from both sides trying to reinforce the larger formations.


The following battle report was written by Peter,  photos are by Peter and myself.

Rules used were Les Grogonards by Piquet. This was the first time I’ve played Les Grogonards, my preferred Napoleonic rules are Piquet’s Field of Battle.


The Battle of Jamesway Junction, June 23, 1809

Orders of Battle:

For Fuddland: 1/2, 2/2, 1/1,2/1, 1/6 Infantry Regts.), Position Battery #6 (12#), Horse Battery #3, 1st Cossacks. Observation Balloon #1. (All units are “Line”, except Cossacks “Militia”). Fuddland reinforcements: 1/4, 2/4th (line) and Horse Battery #4. (All “Line”)

For Gulderland: Daulhat's Converged Grenadier BN ("Elite"), 1st Battalion, 68th Light Infantry Regt. ("Crack"), 1st Battalions, 16th, 18th, and 50th Regiments of Foot (all three "Line").

“I have a bad feeling about this” remarked Major General Ignatius S. Brumwell to his aide, the right honorable Boniface Achilles Kerr, generally know to the army as ‘Bonkers’. “Our Infantry is better trained and more experienced than theirs, being particularly proficient at musketry. I wouldn’t hesitate to take on 7 of his units with five of ours”. Still, one of the units of his small Division was unaccounted for, and would be sorely missed in the upcoming battle. The real problem, though, was that the criminal Fuddlanders, while equal to his command in Infantry, had not one but TWO batteries of artillery to his none (One of those being a heavy 12 pounder battery from the unique screeching sound of their roundshot, just now beginning to rain down upon the Gullderland position), and a regiment of those never-to-be-sufficiently-accursed Fuddlander Cossacks. A veteran Officer, he knew the disadvantage he faced possessing only one arm as opposed to the enemy’s combined arm force, and being outnumbered as well. In addition, dust clouds on the horizon betokened additional reinforcements being likely for the opposition. Even worse, the suggestions he had been given for possible withdrawal seemed to amount to and advance against the enemy rather than putting distance between them. “Bonkers, I’ll have a flask of that fine Port we picked up last week, if you please!” He had the feeling that before the day was over, he might have need of even stronger solace.

It was early afternoon before the Fuddlanders, under the command of General Ernest Davros Blowfeld, deployed and began their advance. Their 2 artillery batteries made good use of the time by shelling the elite Daulhaut’s Grenadiers at medium range repetitively, the fire of 12 pounders being particularly effective. Forced to stand immobile while file after file was bowled over by the cruel roundshot of the enemy, the veterans merely closed ranks after each comrade fell. Yet even such a magnificent display of discipline has its limits, and by the time the Fuddlander Infatry had closed to engagement range with the Gullderland lines, the Grenadiers had ceased to exist as an effective fighting force (all 4 stands lost).

The Fuddland Observation Balloon was launched and provided a panoramic view of the Battlefield for the edification of their commander. Three Columns of rapacious Fuddlander brigands, with yet a fourth trailing behind closed upon the single Gullderland defending their Western flank. This unit, the 1/18th Foot had its blood up, being sickened by the reports of murder, rape, and despoilment of fine shrubberies by the Cossacks that had poured into Gullderland (unit rolled up Determined). Their initial volley staggered one of the advancing Fuddlanders (The 2/2 Line - 3 stands lost), but the others still came on, firing before they charged home. The brave 1/18th stood firm, however, despite severe losses from the enemy’s well synchronized volleys (3 stands!). Heavily outnumbered in the melee to come, the situation was looking grim indeed for the Cause!

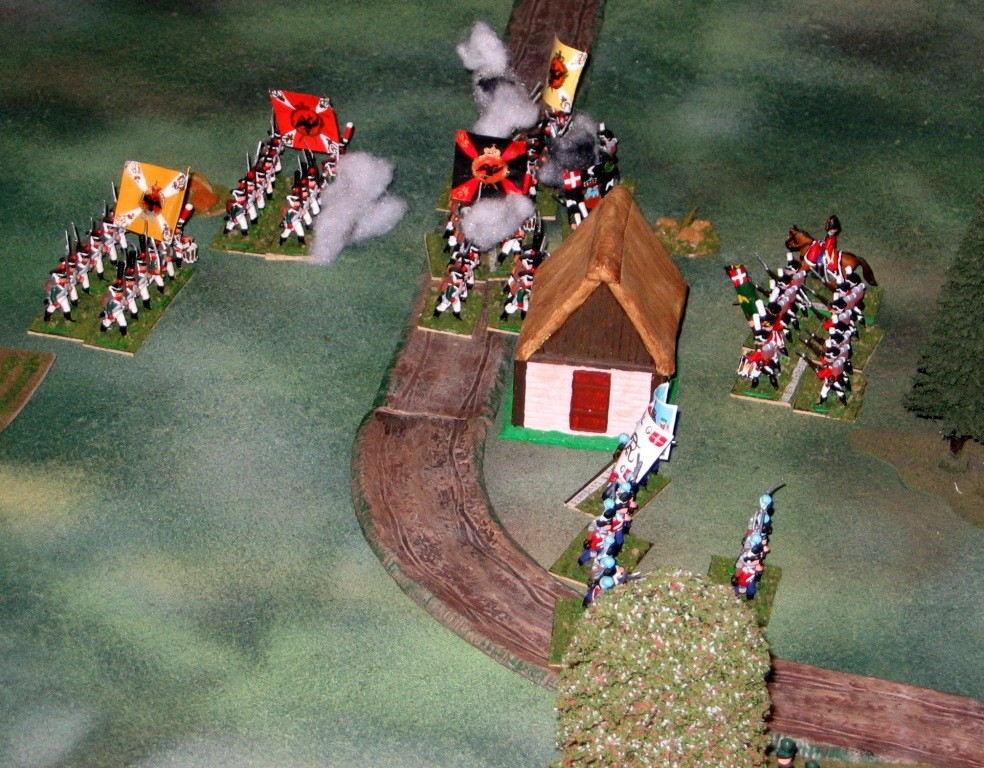
The Grenadiers collapse, as the Fuddland assault begins in earnest. Note the 'rocks' behind the center unit, each rock indicates one stand 'lost' due to combat.


Another view showing the routing Gulderland Grenadiers between the house and trees
In the event, however, the timing of the Fuddland attack went somewhat awry, allowing the brave men of the 1/18th Foot to repulse the first unit, the ½ Line in an extended, pitched melee, the Fuddland marauders ultimately breaking in utter Rout (2 successive MR cards by Gullderland, tie rolls both times, won by Gullderland as having higher base Morale, thus the rout but no significant casualties inflicted – the Gullderlanders were down 3 stands to none for the Fuddlanders). Making use of their superb training, the 1/18th swiftly reloaded and poured a withering fire into the 1/1 Line as it came up. Feeling their Manhood Challenged, the 1/1 also broke in Rout as well (2 stands lost and failed Morale challenge with their die roll Doubled!). With 2 enemy units routed, and a third severely punished, Major General Brumwell allowed a trace of optimism to enter his heart. If he could bring his Muskets to bear on the enemy before their artillery could reduce his command to red ruin, the day might yet be salvaged. “Bonkers, my good chap, would you be so kind as direct the lads to converge on my position here, so that we might concentrate our efforts?” Unfortunately, his optimism would prove to be unfounded.


The 1/18th Foot repulses the Fuddland attack singlehandedly, despite having only 1 stand remaining.
Note the sheep with the lower left unit, this indicates the unit is 'out of command'.  The puffs of cotton indcate that the unit is 'unloaded'.

Waxing his generous moustache carefully and adjusting the brassard that was the emblem of his Aide de Camp status to an appropriately jaunty angle, Bonkers responded with a breezy “Yes Sir!” as he galloped off to carry the General’s orders to the rest of the Division. “We’ll give them bloody blighters a right what for, General!” he called out as he did a stylish pirouette of his horse for the benefit of the Division’s Artist-in-Residence.

Fresh Fuddland infantry unit makes for the gap formerly occupied by the Grenadiers.

Unfortunately, the debonair Bonkers was never heard from again. It was rumored that his neck was snapped in a fall when his horse broke its legs in one of the dastardly wabbit holes known to permeate Fuddland… or perhaps it was one of the many drainage ditches found on the battlefield. Whatever the truth is (perhaps he met up with one the Lady Boobees more attractive 2nd cousins?), the message never got to the troops (in 2 complete turns, Gullderland never got the chance to act on a single Infantry MOVE card until the final death throes of the battle. The first turn ended with them at last turning an Infantry Move card, but lacking impetus to act on it, and then Fuddland wining the subsequent initiative and going through the remainder of their deck, thus ending the turn).

On the Fuddland side, there was dismay at the way a single Gullderland infantry unit had repulsed the attack of 3 of theirs, but recognition that there was little they could do exploit the success with no cavalry, not to mention the powerful Fuddland artillery ready to pulverize any troops exposing themselves (to fire, that is, as much as Gullderlanders have been known to “moon” Fuddlandish soldiers from time to time). Secure in the knowledge that additional infantry and artillery reinforcements would soon be arriving, the plan was changed to avoid the paladins of the heroic 1/18th Foot, and split the remaining forces in two, if possible.

Fuddland Cossacks on their Grand Ride around the Eastern flank of the enemy.


Overview; finally freed from the impedance of ploughed fields and drainage ditches, the 5th Fuddland infantry, seen by the horse battery, is able to advance more expeditiously!

Maneuvering through the gap between the cottage and the largest woods, the fresh 2/1 Line infantry first assailed the Gullderland Light Infantry skirmishers, driving them back, and then turned to fire upon the flank the Gullderland 1/16th Foot, cleverly stationed in reserve in attack column (sheltering behind the Cottage and out of the field of fire of the cursed Fuddland gunners). Meanwhile said artillery turned its attention on the victorious 1/18th. It was too much. Their numbers reduced to a pitiful few, they ceased to be an effective fighting force (the 4th stand was finally lost). Meanwhile, the Cossacks conducted a grand sweep around the farm and into the rear areas of the Gullderland Division. It was as though the Gullderlanders were mesmerized, seemingly unable to take the initiative to respond to changing circumstances on the battle field.


The inevitable result of such inaction thus occurred; the Cossacks swung all the way around to strike the 1/50th Foot in the rear, routing them. The 1/6 Fuddland Line swept forwards as well, exerting still more pressure on the crumbling center. Major Percy Grunwald of the 68th Gulderland Light infantry at last seized the moment and directed his men to about face and draw a bead on the infernal horsemen of the steppes. With a terrific cheer (and a large cloud of black powder smoke), the greencoats fired. When the smoke cleared, the Cossacks seemed miraculously unaffected. It appeared that, in their eagerness, the Light Infantrymen had aimed high, not allowing for the reduced height of the wiry ponies the infernal marauders used as mounts. “I have a very bad feeling about this” mumbled General Brumwell to no one in particular, that scoundrel Bonkers being nowhere to be seen. Ordering his silver tea service to be packed hastily, he personally directed the only intact unit in his command to withdraw from the field via the road to the North. Hopefully many of the stragglers from the other units would later rally to him there.


In the event, the Light Infantry were all but surrounded by the Cossacks, 1/6 and 2/1 Line. Defeated in Melee by the cossacks with heavy losses (2 stands), the remainder fled, the majority of whom were captured. Brumwell would have to nurse his wounds (and his now difficult to replace tea supply), whilst Blowfeld called for some celebratory brandy, as well as a patriotic local wench. “Oh, and get that stupid balloon packed up, will you?” [Gullderland ended with zero MC, while Fuddland still had half of it starting allocation.]


The result of the effective employment of Fuddland’s Acme Pine Suppositories are seen here. Amazingly the Line unit would later rout off the table to the North. The Light Infantry were not to be as fortunate, once their attempt at ventilating the kaftans of the Cossacks failed miserably!

Regarding the non-appearance of the Fuddlander reinforcements for the battle, the fol,lowing interaction was noted, several miles behind the leading Fuddland units. Captain Shtarker (aide to General Siegfried) galloped up to General Siegfried, "Sir, I hear cannon fire to our front! Vhat are your orders? Should ve to ze sound of ze guns march?"

Siegfried replied, "Shtarker! Ve are Fuddland; Ve do not 'to ze sound of ze guns march’ here!

Final Tally:

Fuddland – 1/2nd Line routed off the table to the South, no stands lost; 2/2nd Line 3 stands lost, good order; 1/1st Line 2 stands lost, routed off the table to the South. All other units intact and in good order.

Mentioned in Dispatches: Position Battery #6, Major Mayhem and the 1st Cossacks.

Gullderland – Daulhaut’s Grenadiers 4 stands lost; 68th Light Infantry 2 stands lost in melee, ¾ surrounded, we ruled it surrendered, maybe 25% of the unit slips away to the West; 1/16 Foot 1 stand lost, exits the table to the West (with Generals) in good order; 1/18th Foot 4 stands lost; 1/50th Foot 1 stand lost, routed off the table to the North.

Mentioned in Dispatches: 1/18th Foot (only Gullderland unit to inflict any losses on the Enemy at all!)